Do you find yourself duplicating an object multiple times just to use different textures for the same model? If
that is the case, give the matl_freetex feature a try.
Freetex is a way for OMSI map developers to dynamically substitute textures in models by entering the desired
texture name to a field in the object's label. This negates the need for duplicate objects with only changes in
textures, hence reducing clutter of .o3d model files and .sco configuration files.
This tutorial will walk you through the process of making an object with the freetex ability. We also recommend
you to take a look at Marcel Kuhnt's SDK Technical Handbook 2 , which is a
good source for more information regarding how textures work in OMSI.
Step 1: Get your object model ready
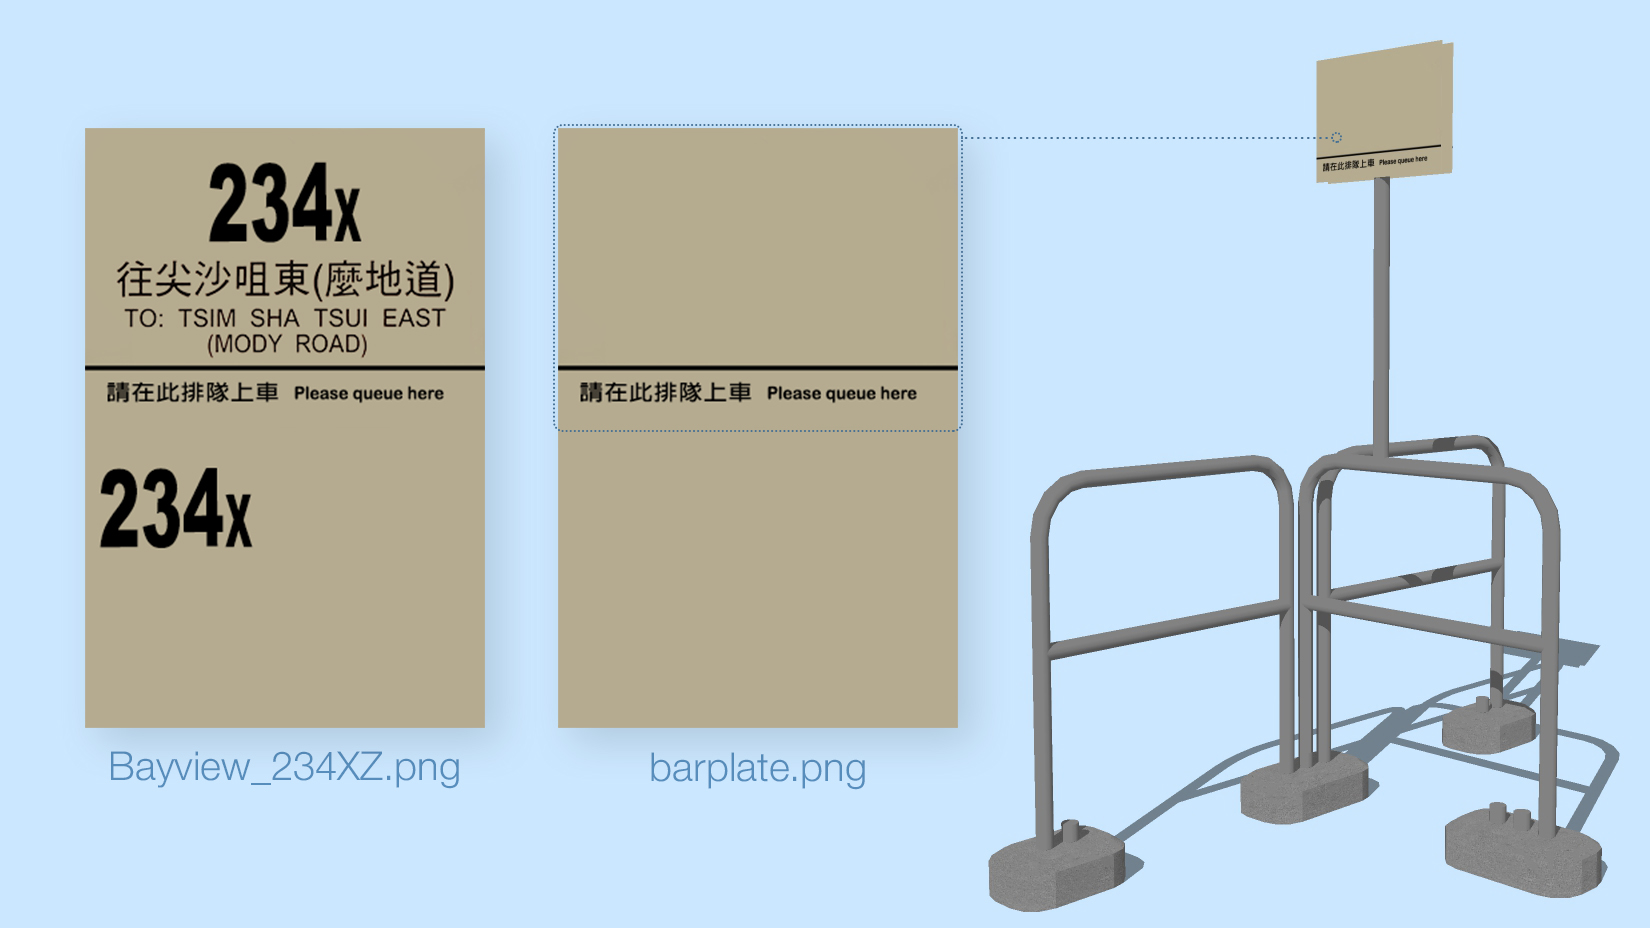
First thing to have is a working model of course! For this tutorial, a model of the KMB queue barrier is used.
The plate is mapped with barplate.png.
In this model, the plate is mapped with the texture barplate.png. The goal is to change it to
Bayview_234XZ.png inside OMSI Editor, instead of exporting a duplicate object with the new texture.
Time to export the object and convert it into OMSI!
The object imported to OMSI.
Step 2: Adding [matl]
Now that the object is in OMSI, let's start working on changing the textures. To modify the properties of a
texture, the first thing to do is to specify the texture.
In the .sco configuration file, locate the model name that our texture belongs to. In this case, the
texture barplate.png is a texture in barwithplate.o3d. If you are using FixZMX, the
program may already have generated the entries for you. To specify the texture to be modified, the
[matl] tag can be used.
The syntax is as below:
[matl] {texture-name} {texture-index}
Under normal usage, there will be two arguments following the [matl] tag. The first argument is the
texture file name that you wish to reference, and the second argument is the index number of the texture within
the specified model. The index number of the texture is particularly useful when you are dealing with a model that
reuses the same texture multiple times across multiple surfaces and you need to specify which texture you are
referencing to.
An example of the usage of texture tag is shown below:
[matl]
barplate.png
0
In this case, the texture to be specified is barplate.png, so we put it on the line after the
[matl] tag. Since there is only one instance of the texture barplate.png, the index would be 0, which
means it is the first occurance. (OMSI counts from 0, same with most computer programming languages.)
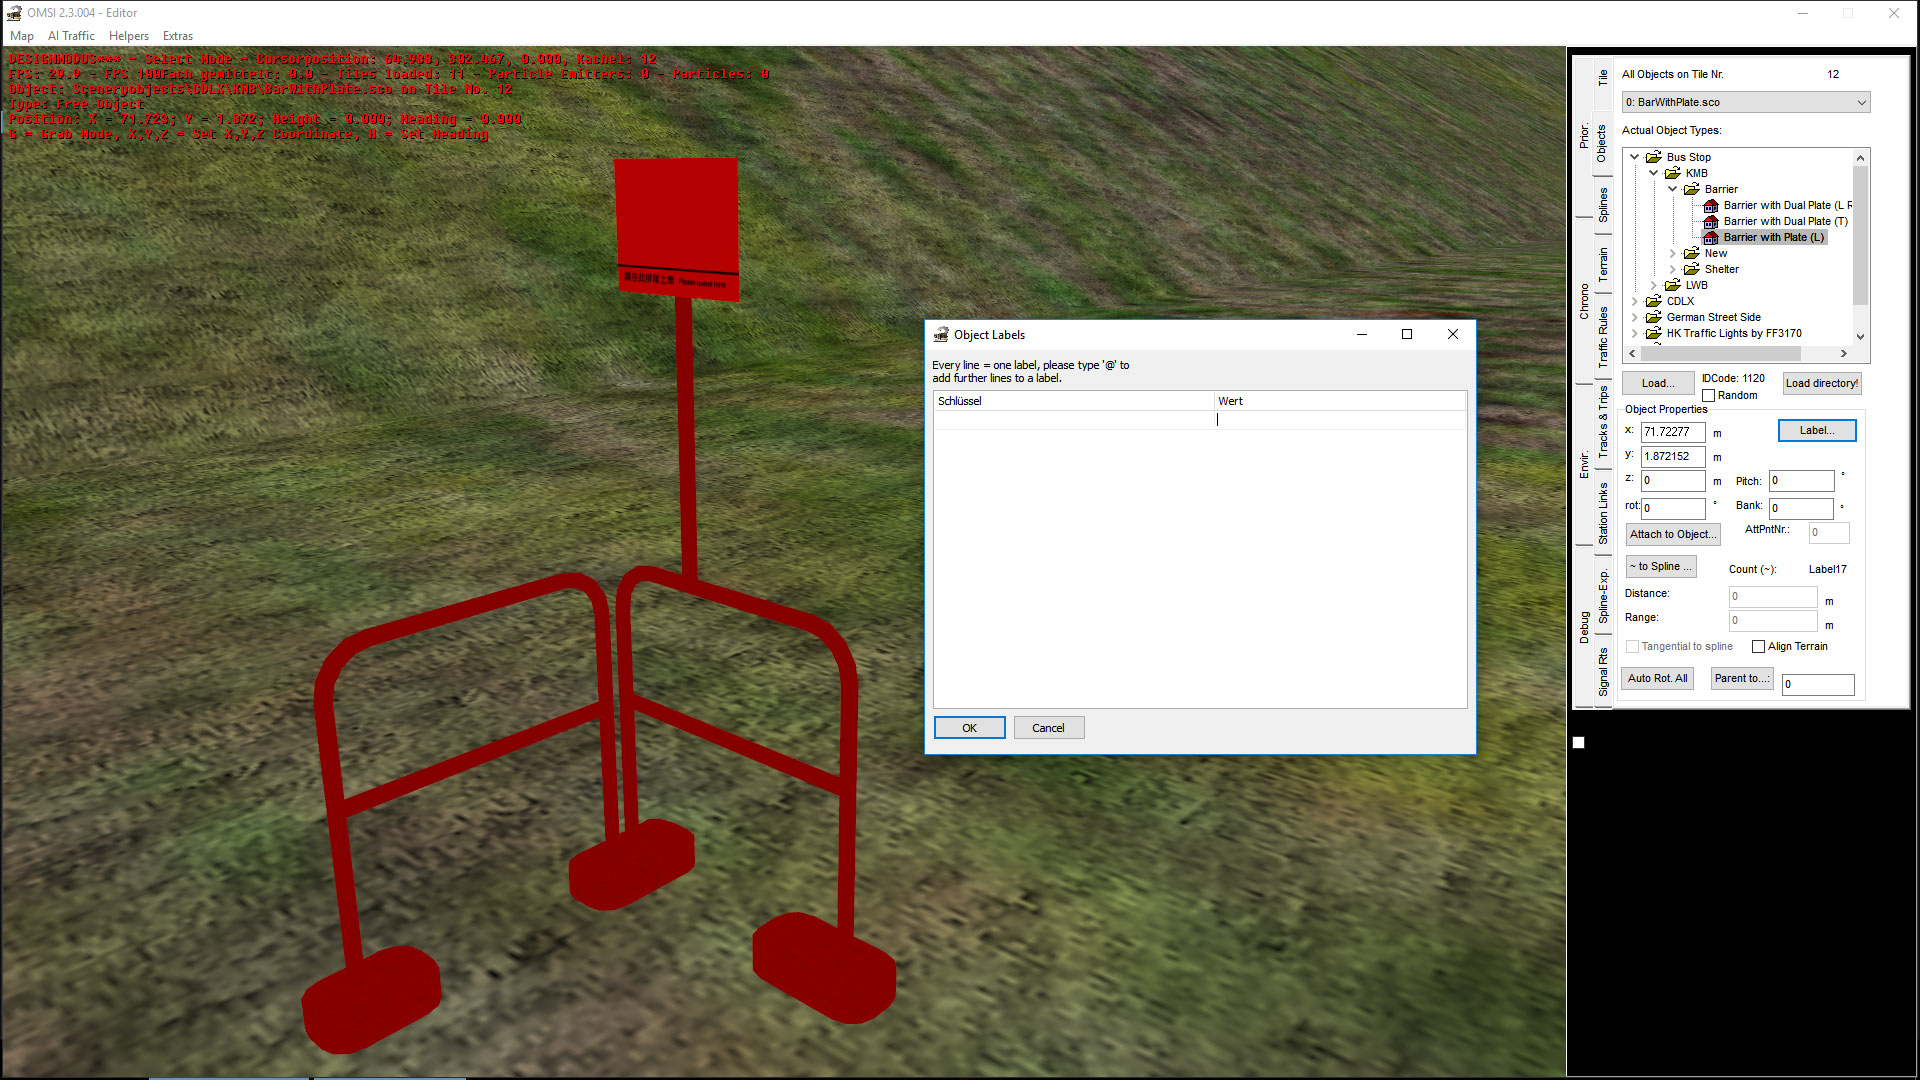
Step 3: Adding [matl_freetex]
Once the texture is specified with the [matl] tag, it is time to work with the
[matl_freetex] tag.
The syntax is as below:
[matl_freetex] {texture-name} {friendly-name}
The [matl_freetex] tag is to be put beneath the [matl] tag. The second line is the texture name to
be replaced, which would be the same as the one specified in the [matl] tag. The third line is the
friendly name that you want to give to the texture. The given name will appear in the object labels dialog box in
OMSI editor, allowing you to distinguish between multiple freetex entries easier.
Here is an example of the usage:
[matl_freetex]
barplate.png
Plate Image
Step 4: Adding [stringvarnamelist]
Now that [matl] and [matl_freetex] are added, there is still something. If we go into
OMSI Editor, there is still nothing in the object's Labels.
Even though we added [matl_freetex] from the last step with a specified texture and friendly name,
OMSI still has no idea how to associate the friendly name to the image. This is why we need to create a string
variable list so OMSI can associate the string variable to the texture so it can be changed in the rendering
process.
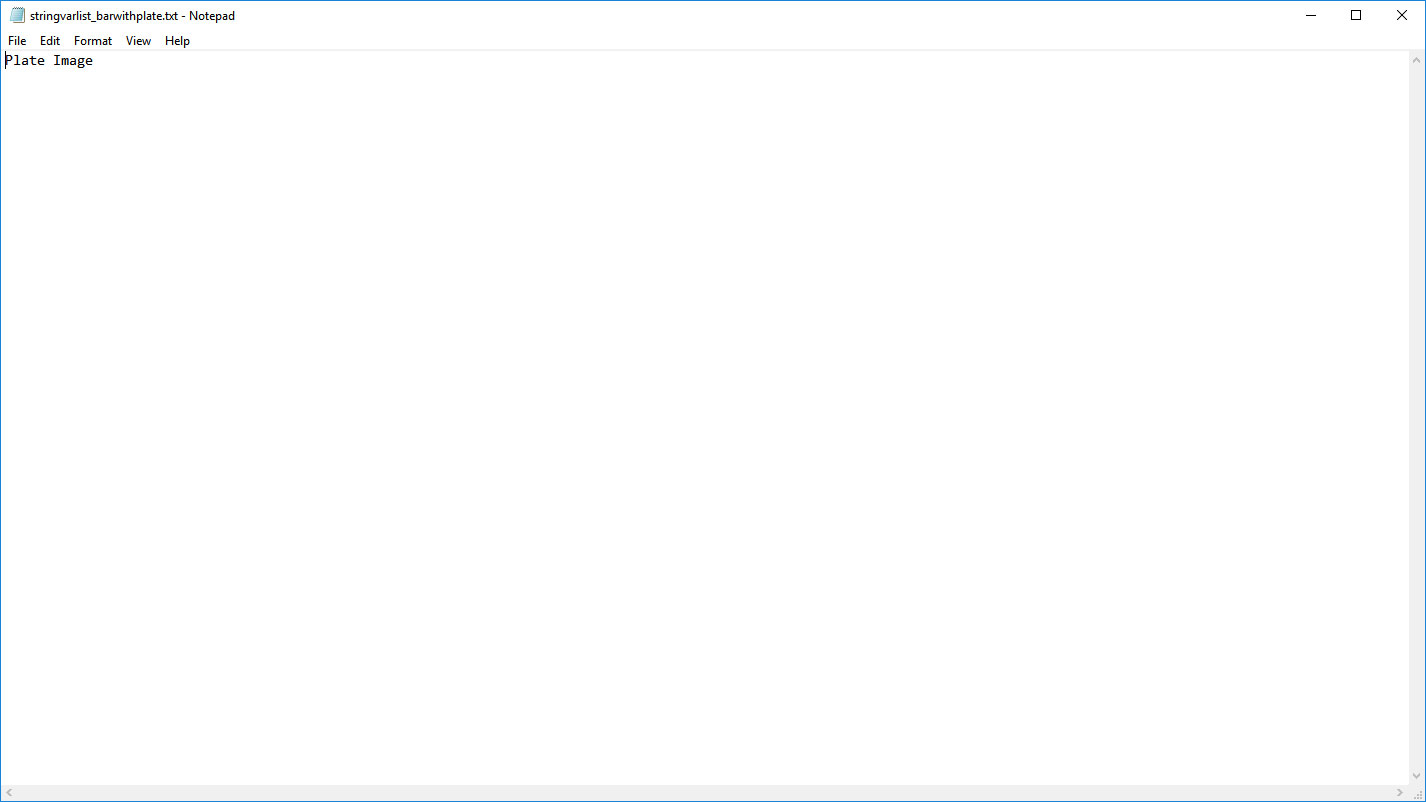
To do this, we need to create a .txt file that houses the variable list. You can call it anything
you want, but as an example we will call it stringvarlist_barwithplate.txt .
In the string variable list text file, you can enter one variable name per line. As the friendly name we gave to
the texture is "Plate Image", we would put
Plate Image
into the text file. If there are another string variable, just add it in next line.
There are no entries before adding [stringvarnamelist].
The contents in stringvarlist_barwithplate.txt"Plate Image" shows up after adding [stringvarnamelist].
After saving the .txt file to the script folder, it will need to be included to the .sco file as
well. To include the string variable list, we will need a [stringvarnamelist] tag. The syntax is as
below:
[stringvarnamelist] {number of txt files} {stringvarnamelist.txt}
...
You can include as many string variable name lists as possible. In this occasion, we only need to include one
string variable name list, so we only need to put 1 for the number of string variable name list, and the full name
of the list beneath:
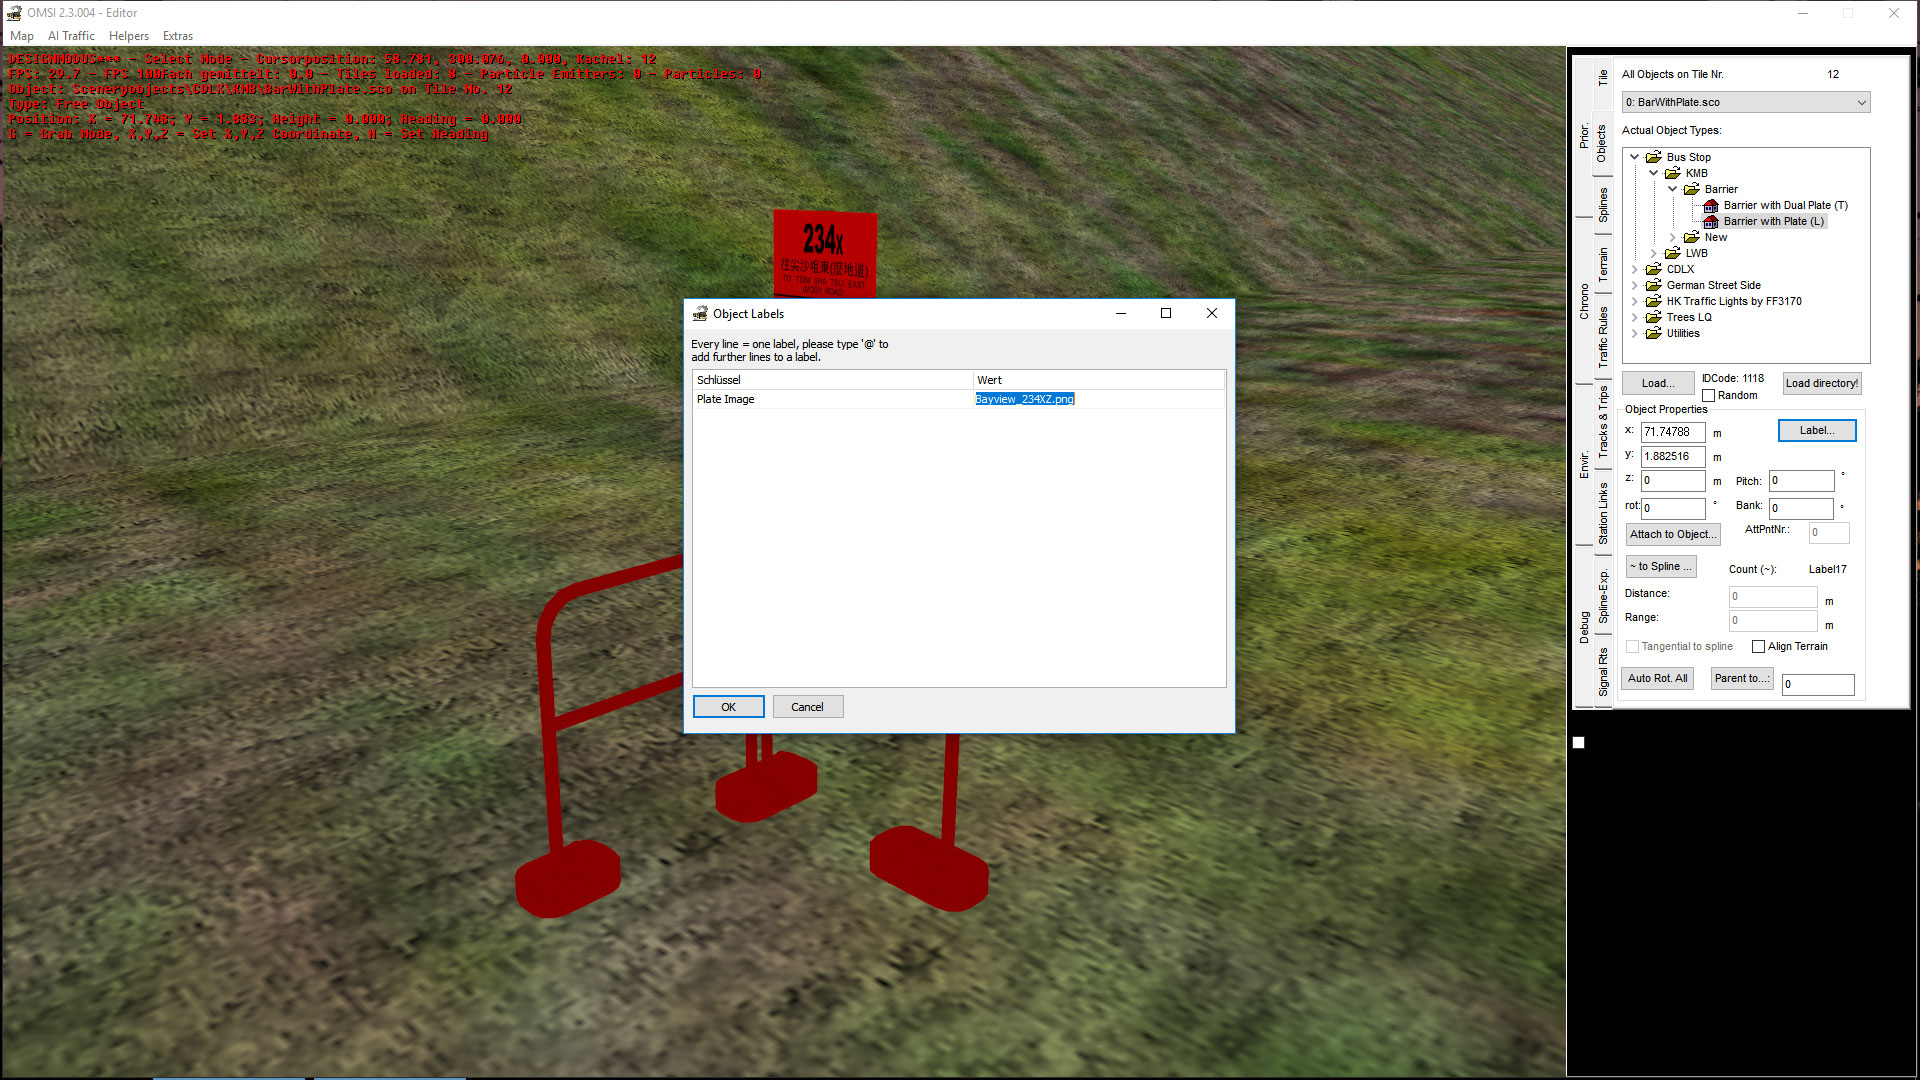
Now we are ready to go! Let's try the object with Bayview_234XZ.png .
The texture has been substituted with Bayview_234XZ.png.
We are done! The texture is now substituted, and it looks good.
Additional Notes
For organization purposes, it may be a good idea to be able to group the textures into subfolders inside the
texture folders.
For example, I would like to place Bayview_234XZ.png inside texture/Bayview/MilkPlate/.
To be able access that texture, we would put the following string into the label. Bear in mind that you have to
use \ instead of /.
\Bayview\MilkPlate\Bayview_234XZ.png
Thank you for reading the tutorial. I hope it helped you understand how to work with freetex in OMSI. If you have
any comments or feedbacks, feel free to contact us at [email protected] or message us at our Facebook Page.